


NORDIC PRIMARY BEDROOM REFRESH
Just like the living room, this bedroom was about 8 years in the making. And to be honest, it’s still not 100% done. But it’s time to start sharing the hey-we’re-99.9% done-shots so you can get a grasp of the entire home, right?
LAYOUT
Before we jump into the aesthetics, let’s talk the layout of the house. We flipped this house completely around. This master bedroom used to be the living room. It had 2 huge 8’ wide bay windows on two of the walls, one complete wall, and the last was an archway to the hall and entrance to the house.
To start, we removed the bay windows from one wall entirely so that the headboard could go there. On the other window wall we installed two really tall windows. The wall that was complete got a new entrance to the bathroom. The bathroom used to be for the rest of the house and accessed from the hallway. We closed off the hallway entrance (oh, which was under a staircase mind you, so the entrance to the main house bathroom was like 6’ tall!) so that the bathroom now became part of a master suite and was only accessed from the new bedroom. Lastly, we moved the entrance to the house, meaning we framed in the door, took out the arch and turned the hallway into a master closet on one end and the entrance to the bedroom on the other.
Following? Ooof. Here are some before and progress pics to help get you oriented.
BEFORE + DURING
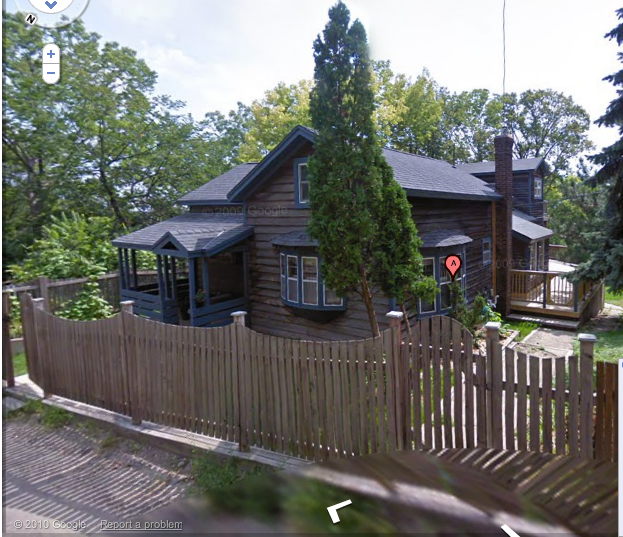
Front porch (far left) used to be the front entrance. We framed it in to be the shed. The deck on the right goes to a second door, which is now the front entrance.

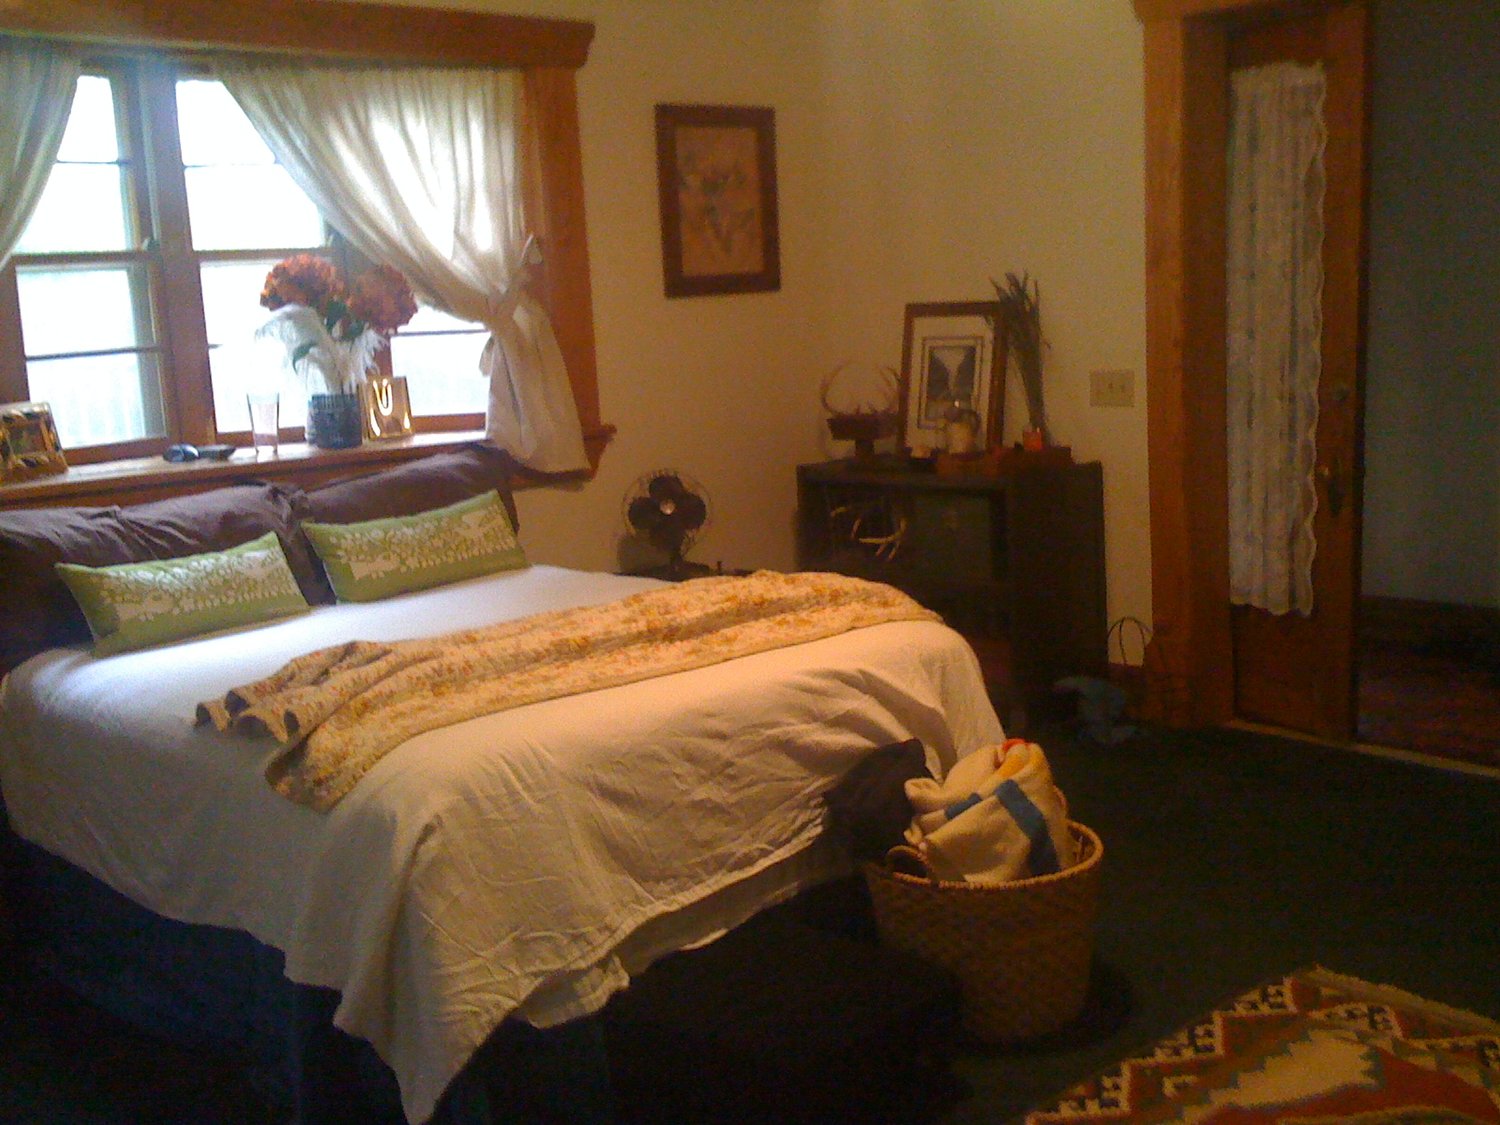
Before with the big bay windows.
Archway on the right to the hallway with the front door open. Notice the lovely green carpet.
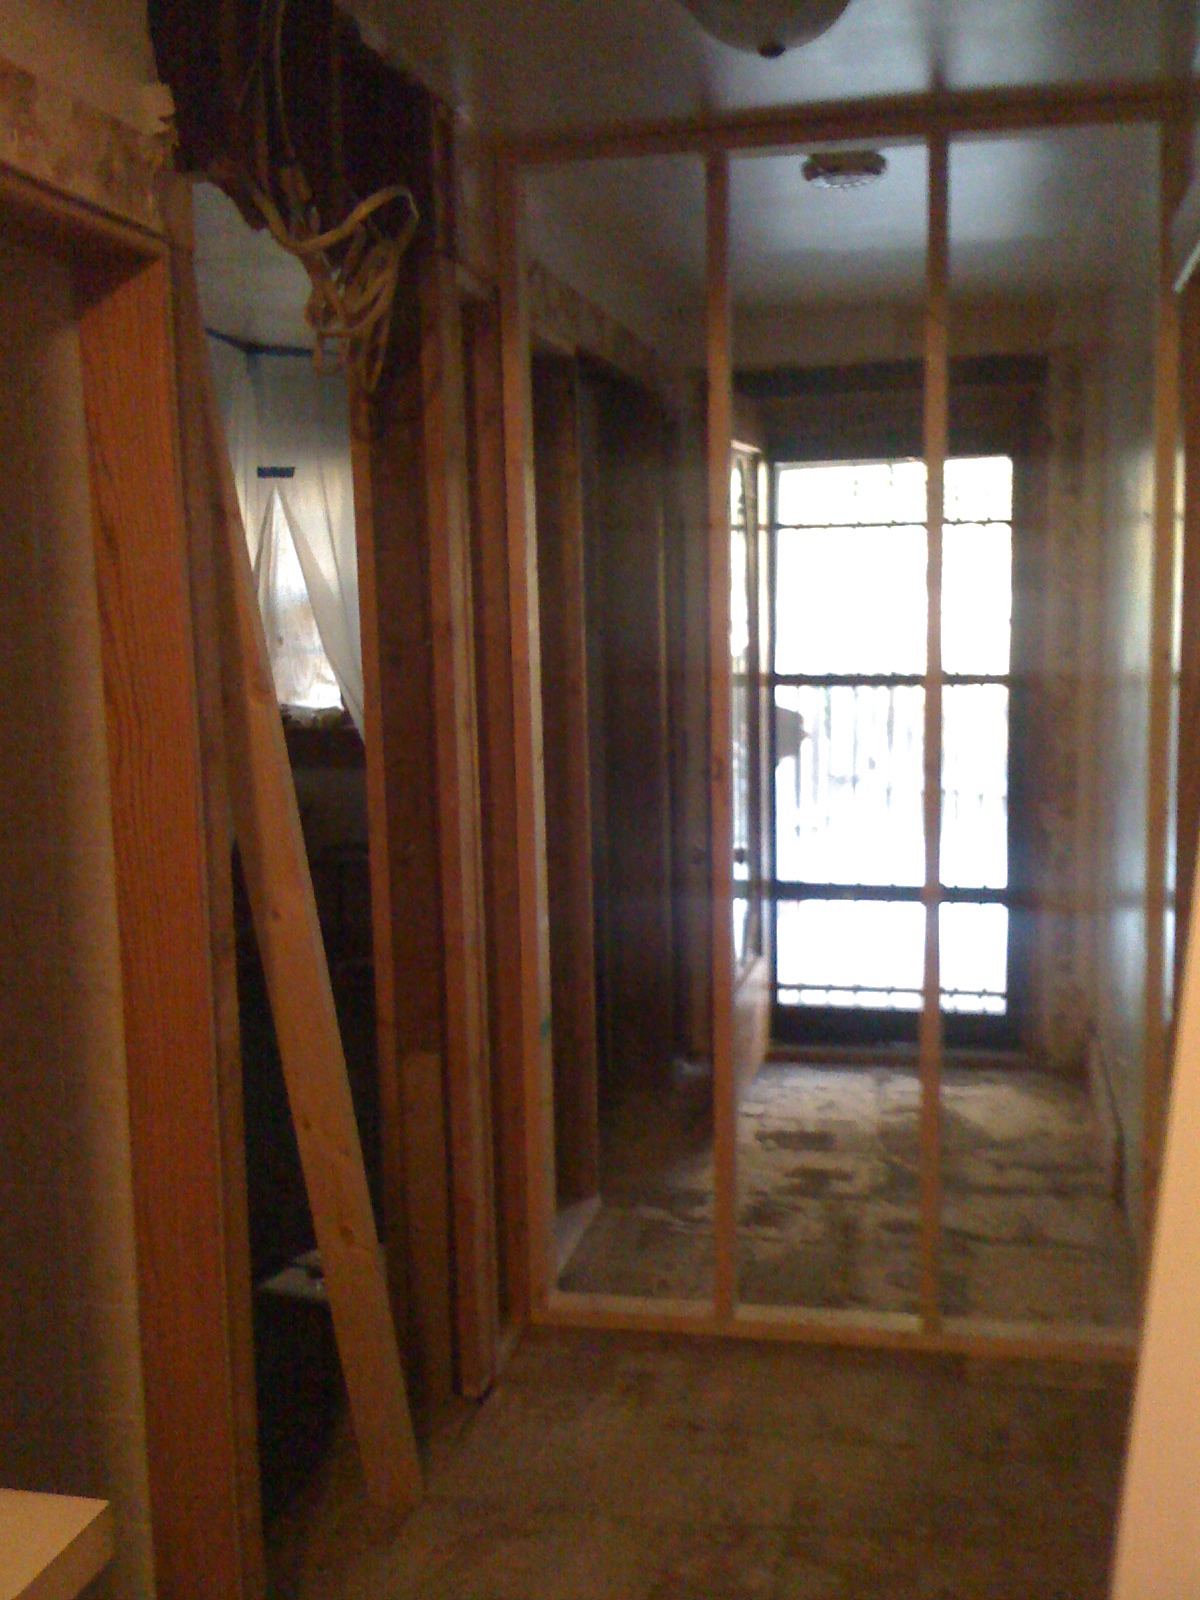
View from the hall. New closet framing and entry door to bedroom. Notice another door to the left (tiled wall), which was the original entrance to the bathroom, that we closed off.
Archway framed in for a closet and new bedroom door. Notice the front door is still in place.
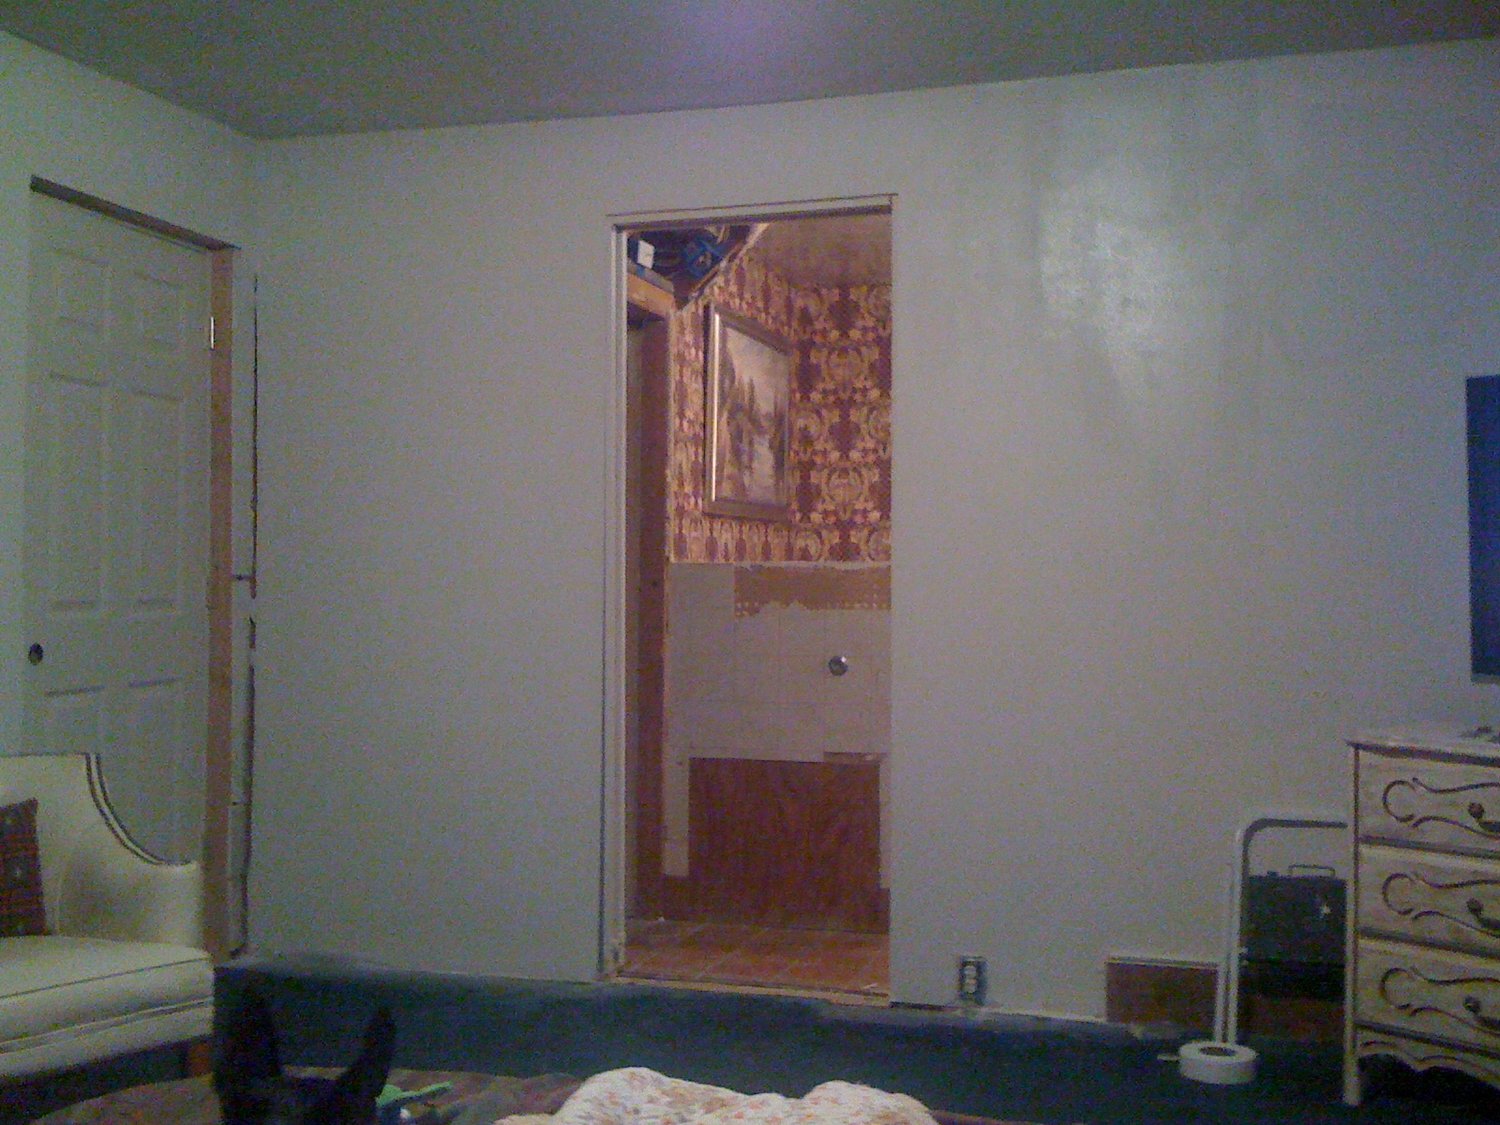
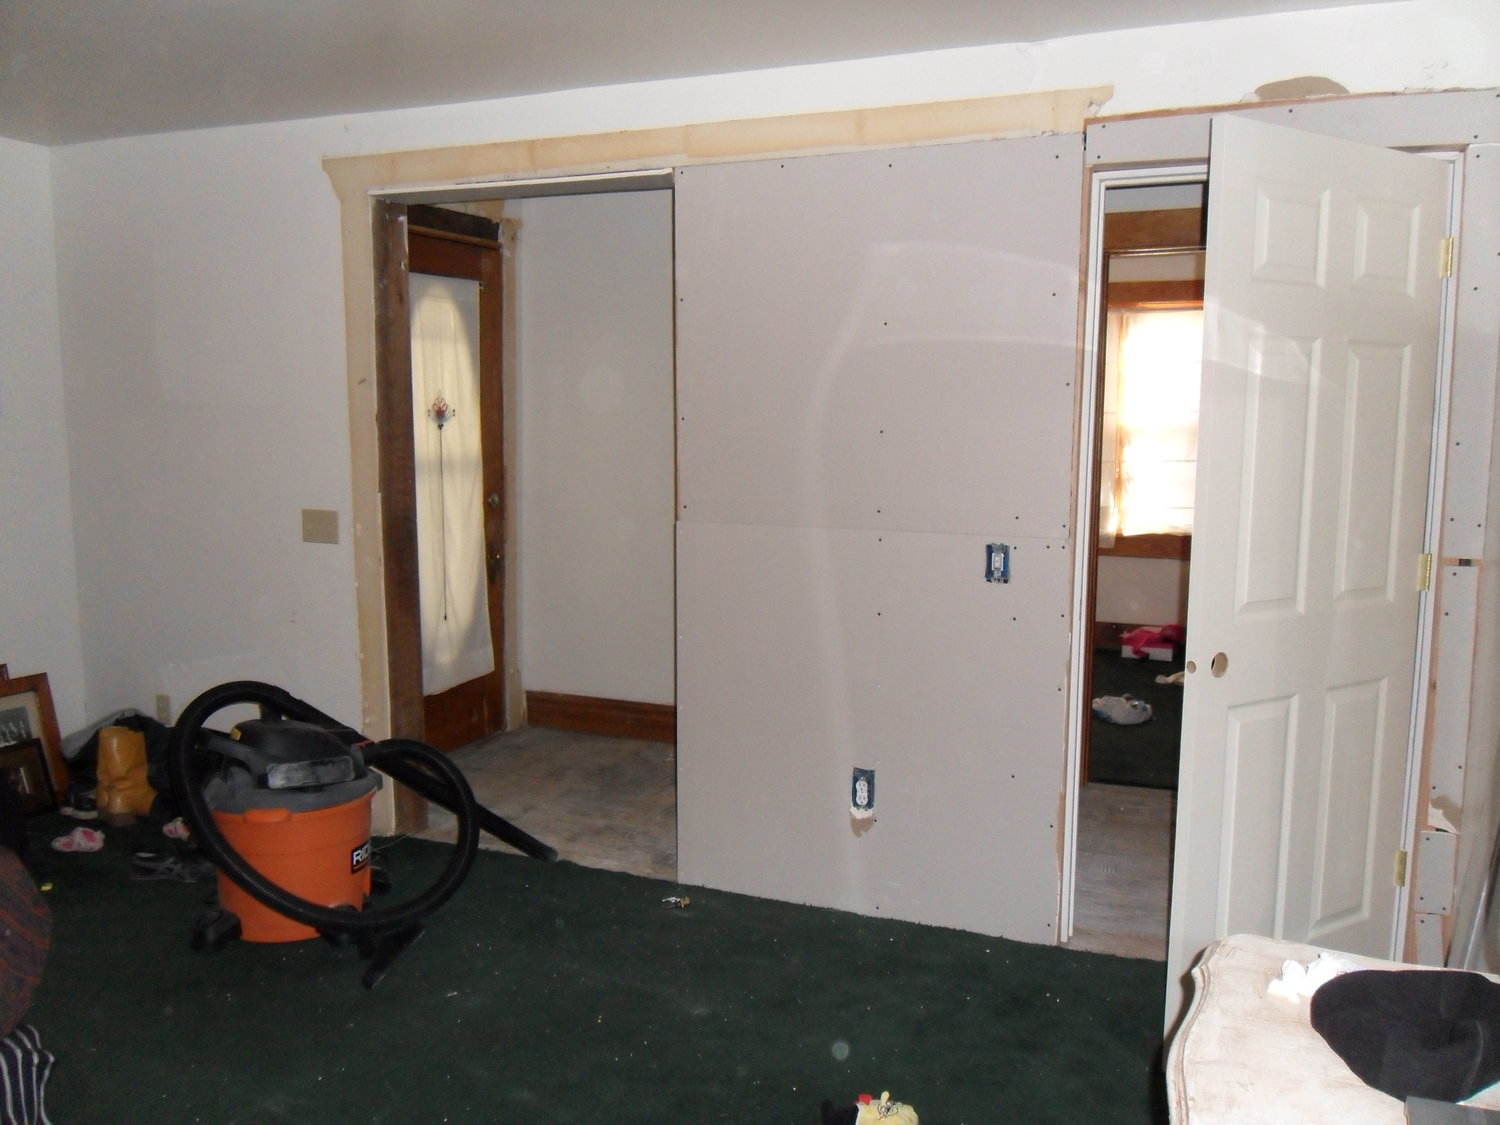
New pocket door entrance to master bath. This wall used to be closed off. New bedroom entry door to the left.
Now that you’ve seen how awful this beauty was, let’s talk finish materials and after photos.
MATERIALS
If you know us, you know we’re all about layering architectural details, less about the fluff you put into the space. This master bedroom is a great example of lots of material layers. First up, let’s talk floors.
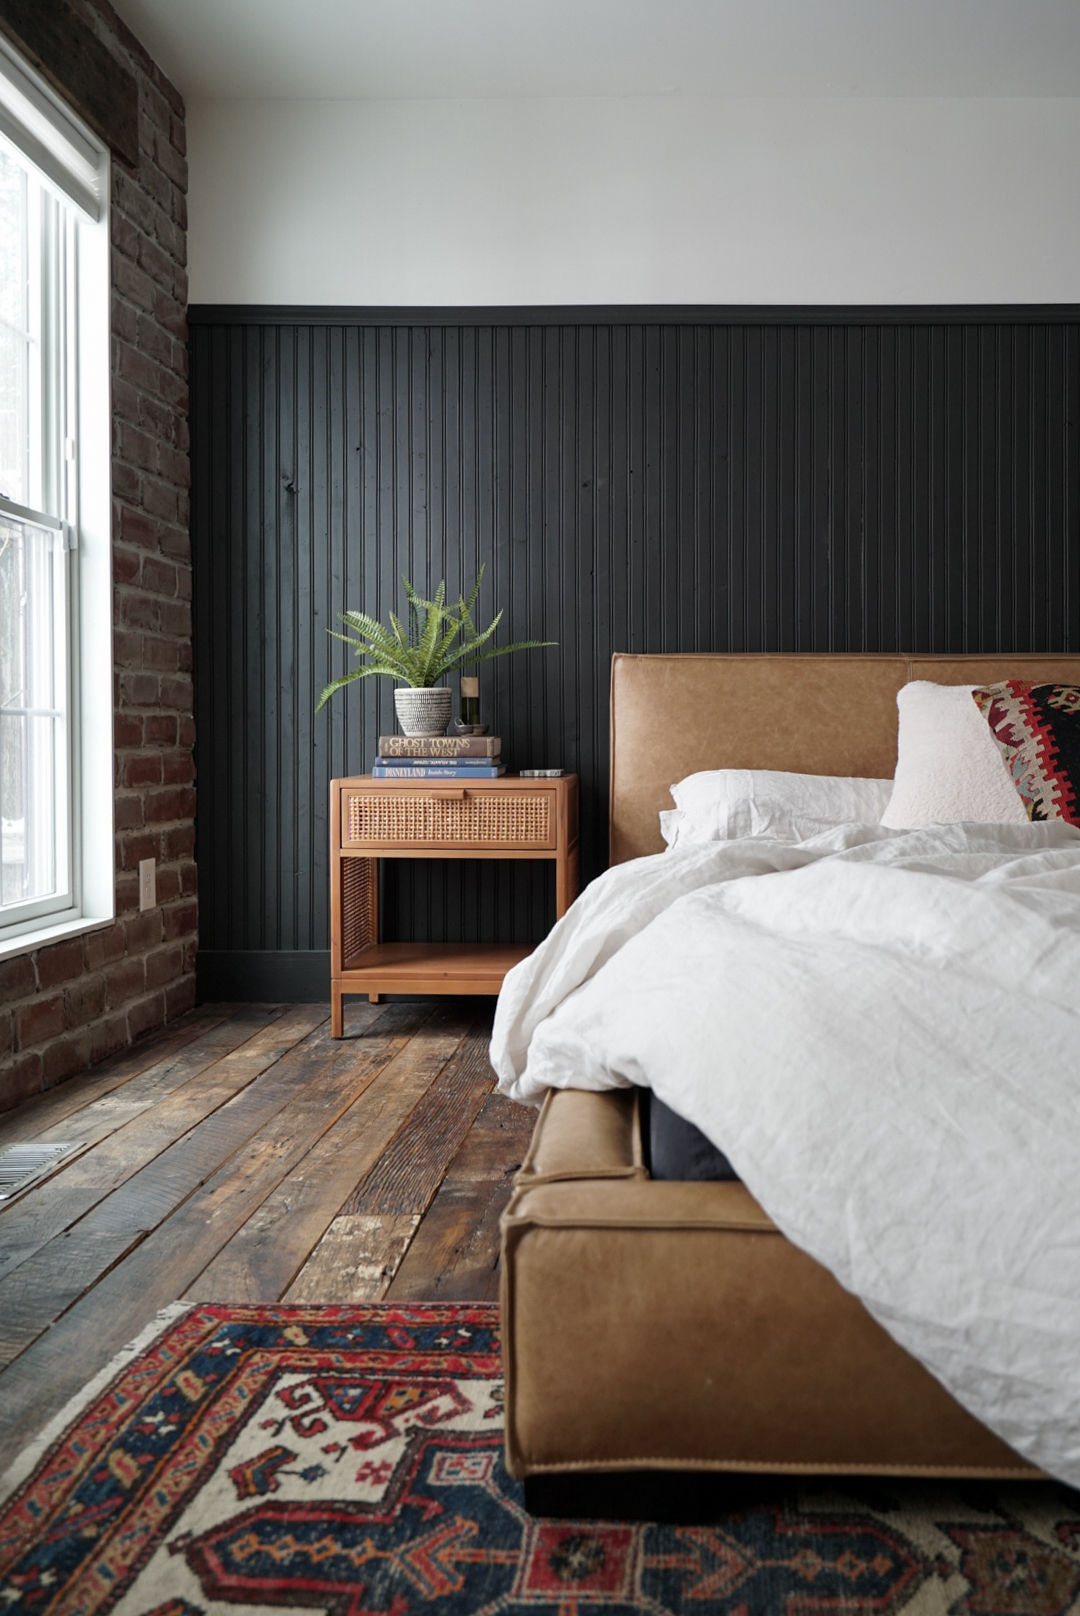
The house had 3-4 additions over about 100 years, none of which were built properly meaning the floor levels didn’t line up. One of the biggest undertakings was leveling all of the floors. That means we had to cut down strips of wood every 16” for the ENTIRE main level, each strip being a custom cut to adjust and make the floors level. The positive is that we now have very sound floors that don’t creak and had no guilt using new flooring. In fact, under one closet was amazing 8-10” wide boards that we used as window headers throughout the house! Back to the floors…we ran the same flooring throughout the entire main level, which is a mix of reclaimed hardwoods that we had milled into flooring. We sealed them with a zero VOC vegetable oil blend that seeps into the wood versus a poly that sits on top.
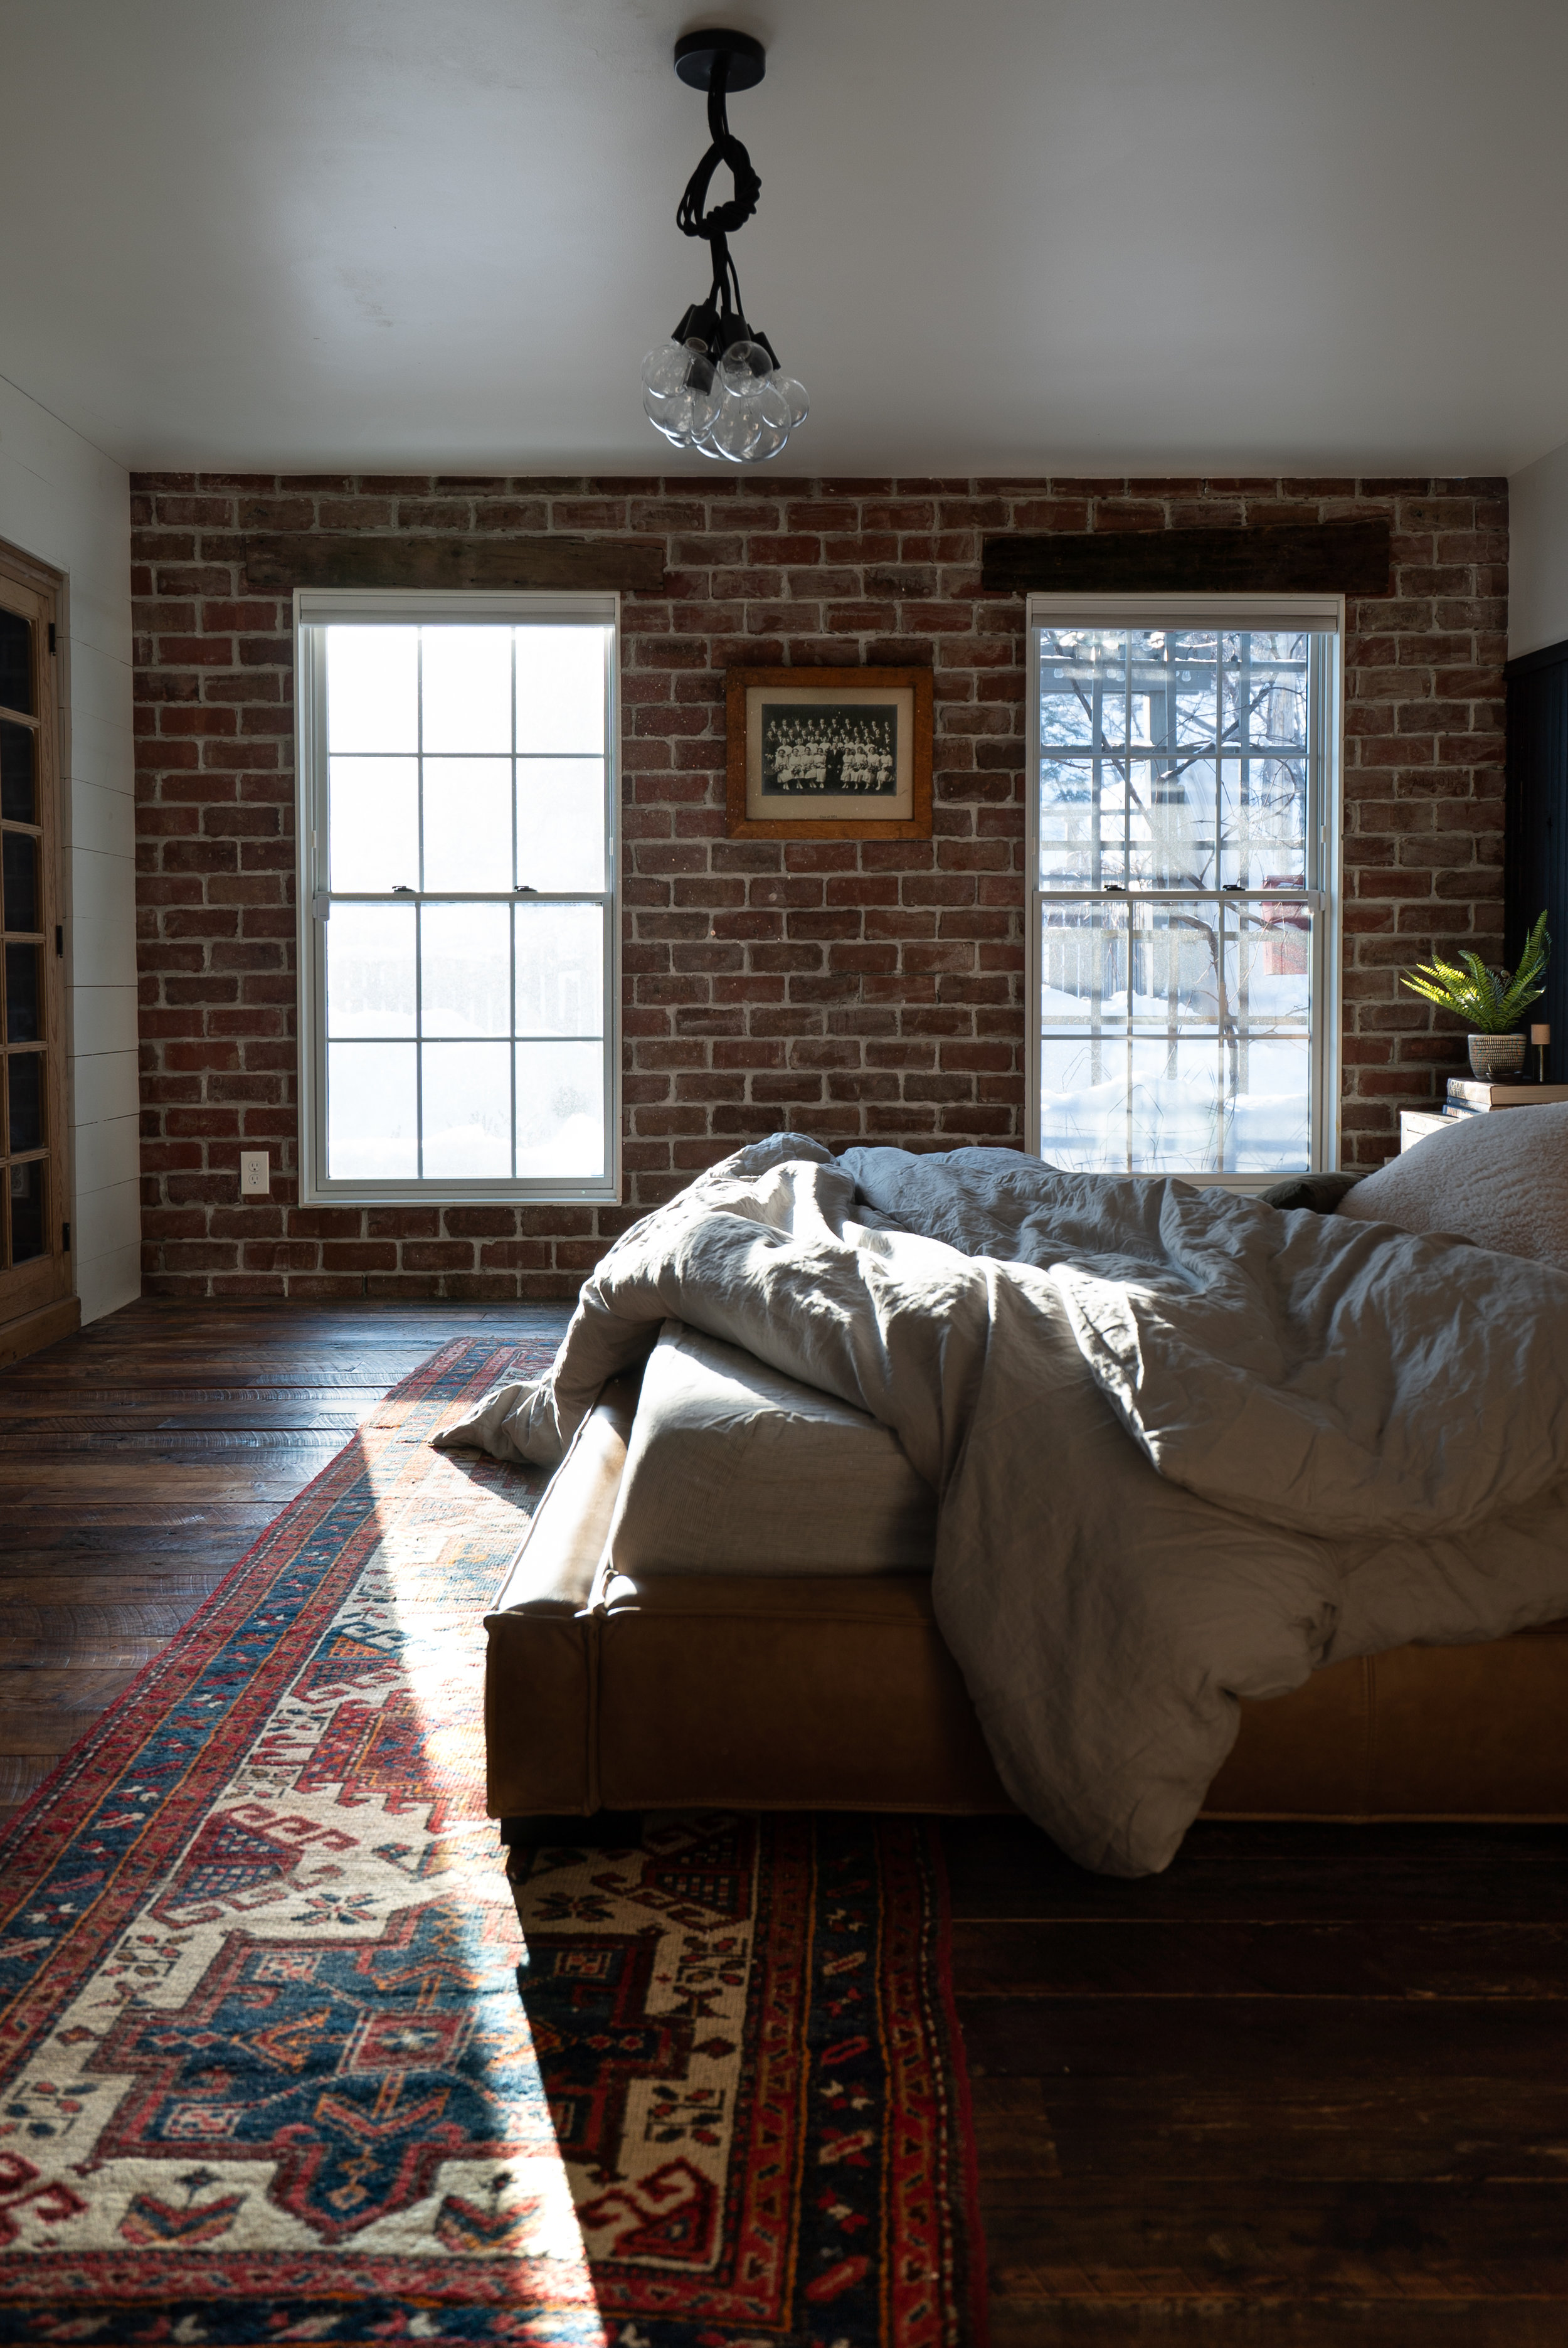
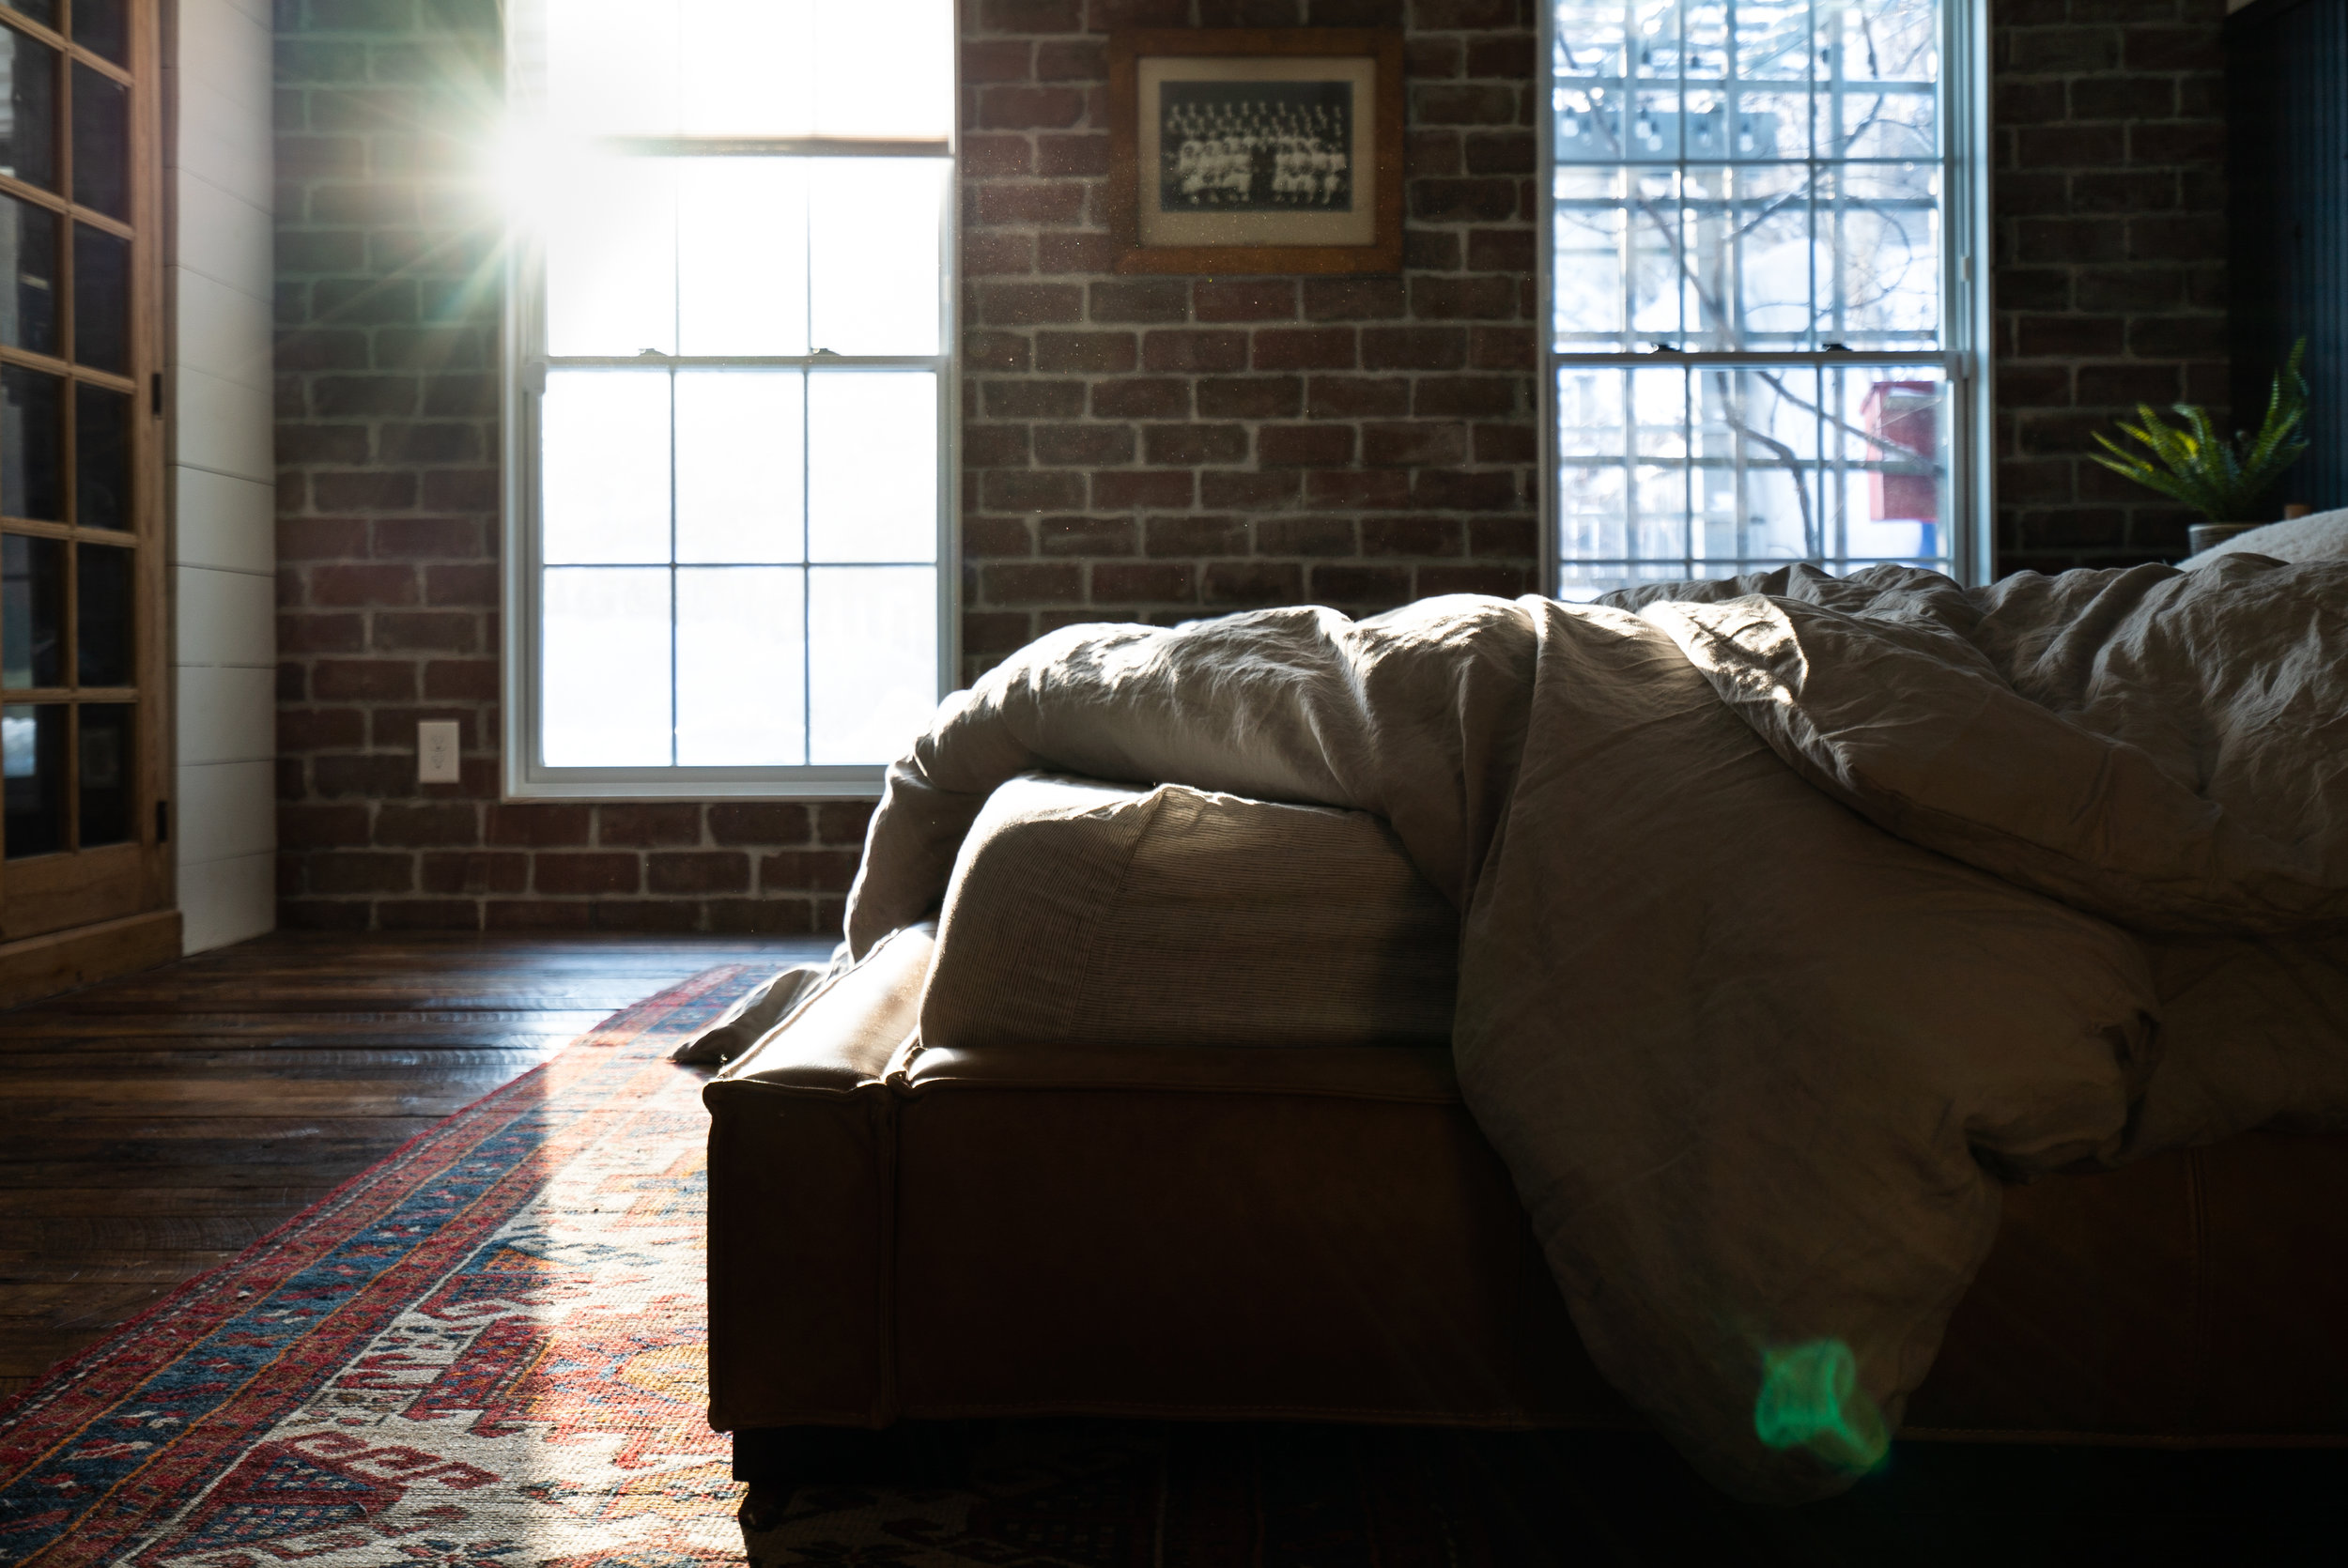
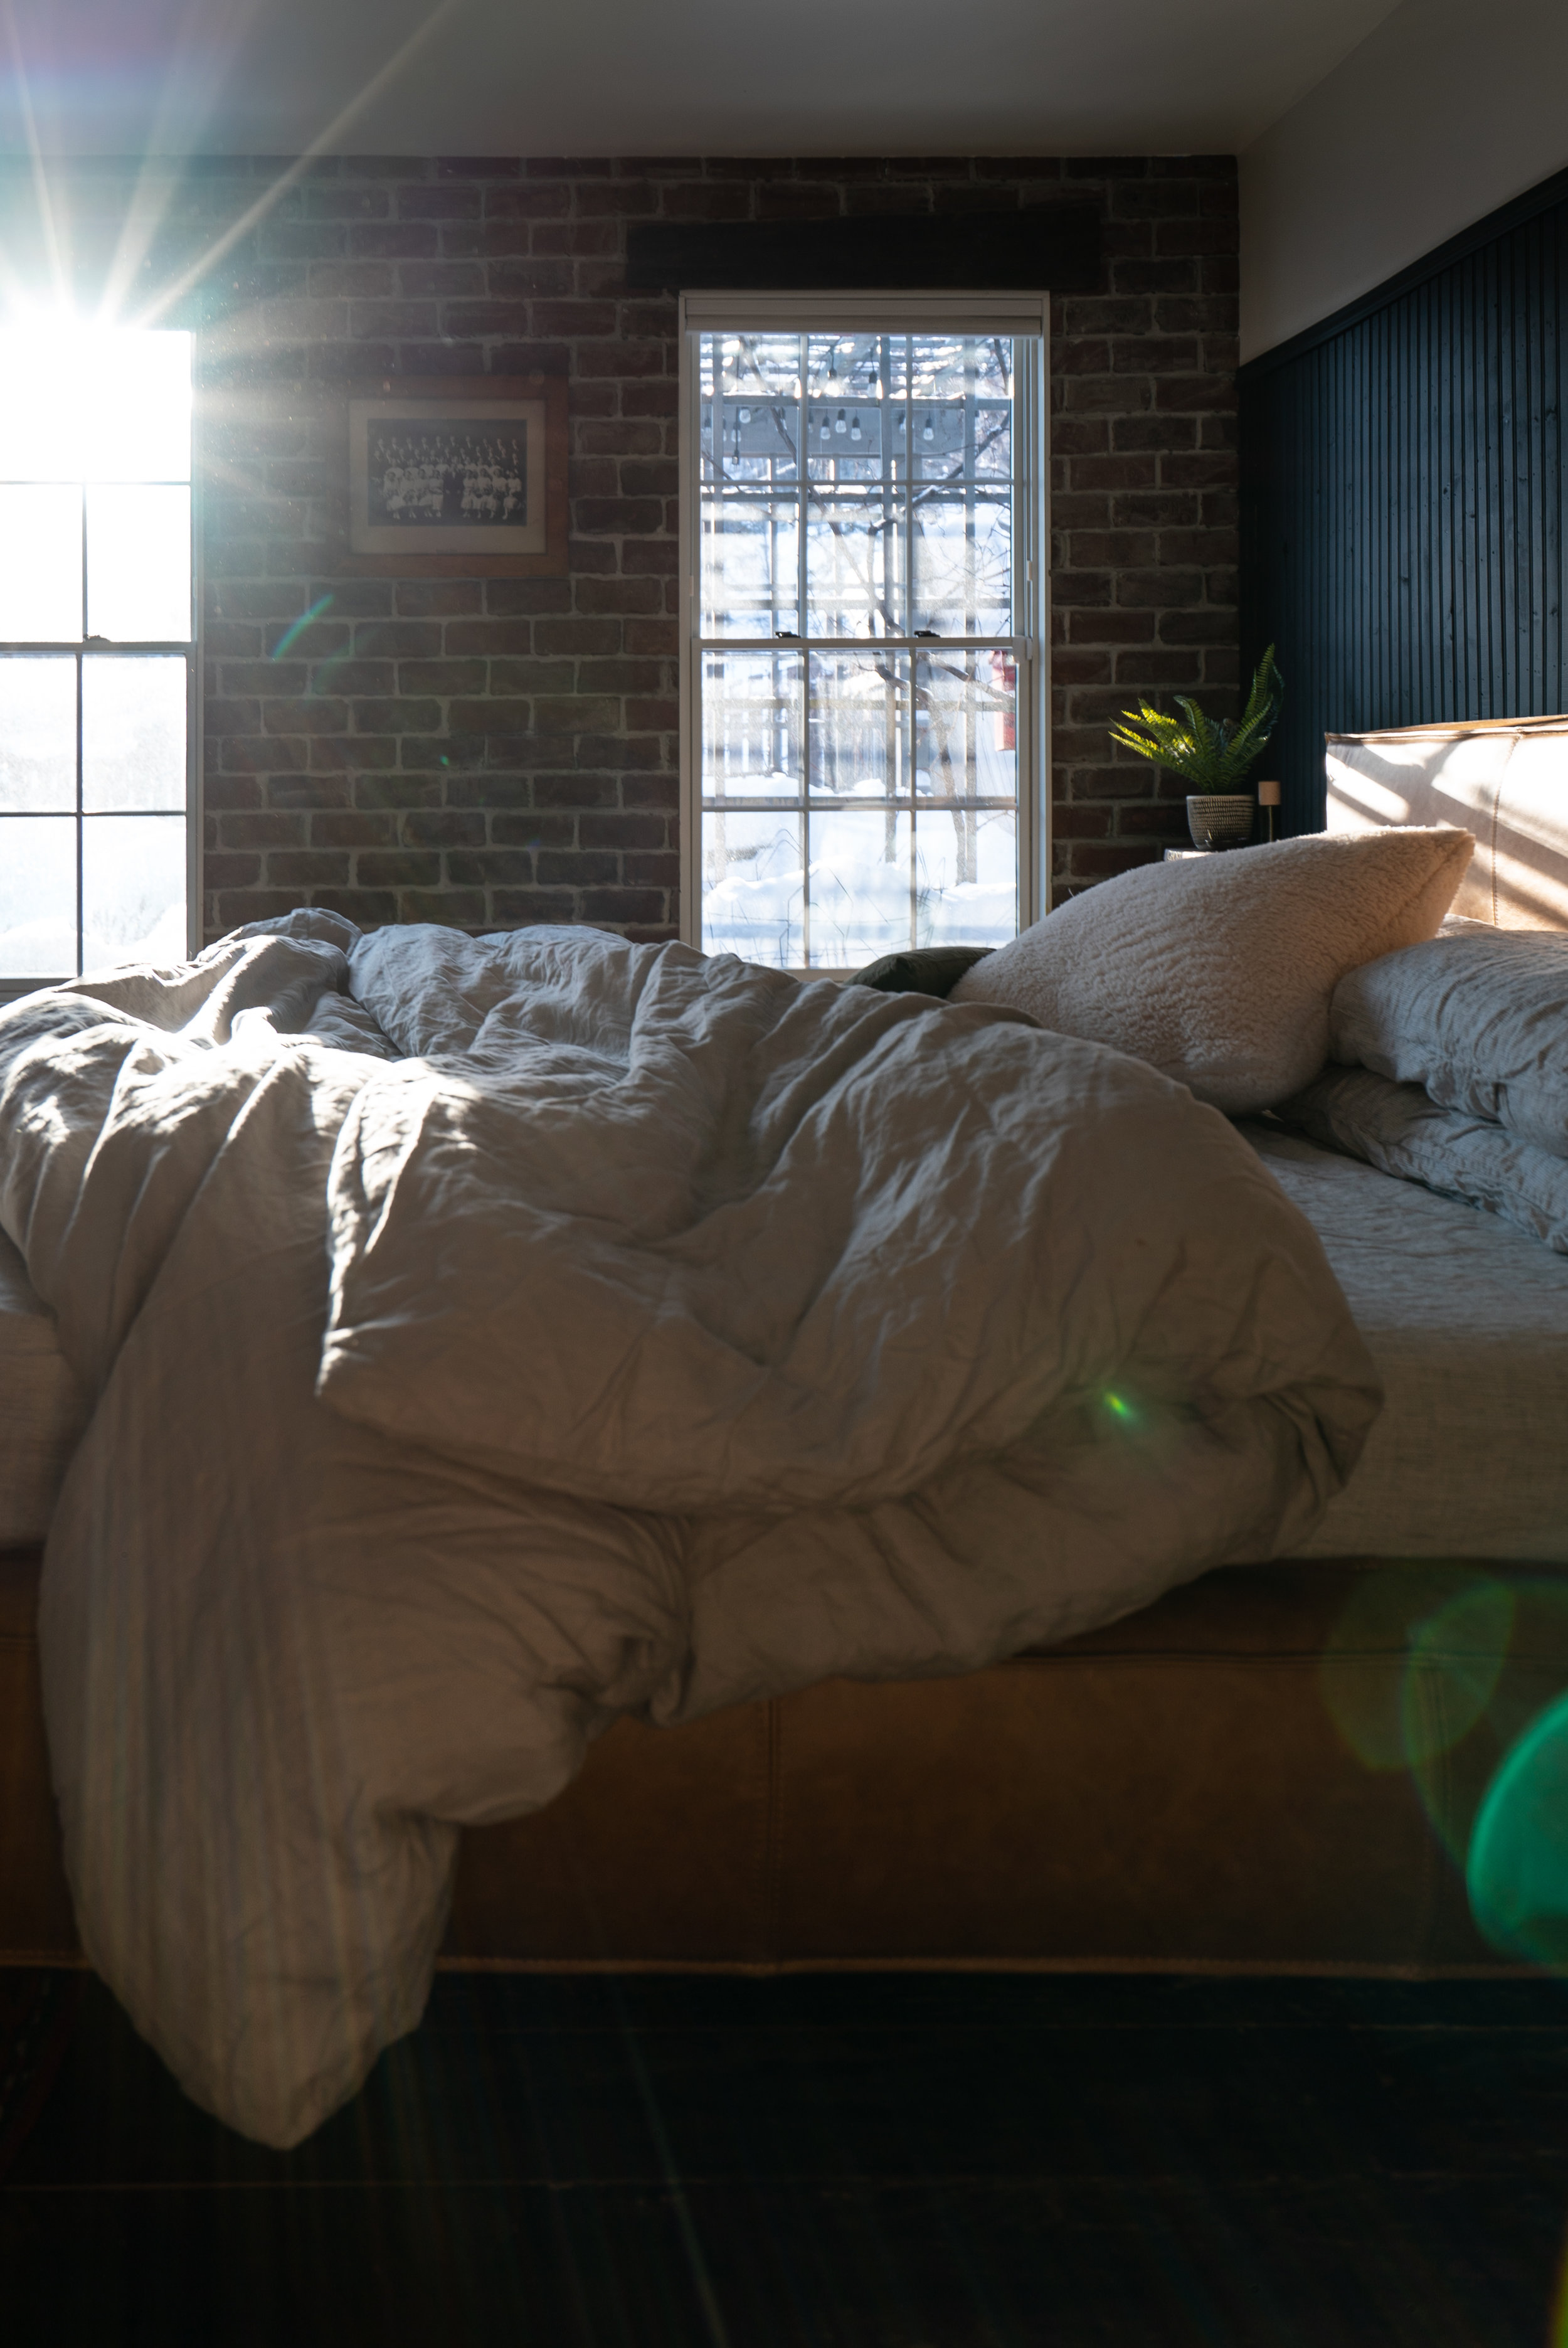
All of the walls and ceilings in the house are the same white (Bowline from Nautica in eggshell) and most of them have 8” wide boards as the finished material instead of drywall. The 2 bedrooms and bathrooms being the only spaces where this isn’t the case. We used reclaimed street pavers that were milled into veneers on the master bathroom walls, so brought them into the master bedroom on the wall that has the two new long windows. Remember those floor boards I mentioned above? Those were used in the master as the headers above the windows.
Opposite the brick window wall is the closet wall. We got a couple barn doors many years ago and used one as the closet door. It’s pretty much just for looks as it never gets closed.
The bathroom entrance wall got a vintage cabinet from the University of Minnesota built into it with a second closet to the left. To the right of the cabinet houses some new ductwork that we brought upstairs. Most of the cabinet is for clothing, proof that you can think outside the box and not go with dressers. On the top shelves is a tv and media station that brings music into the bathroom speakers (a feature the kids love).
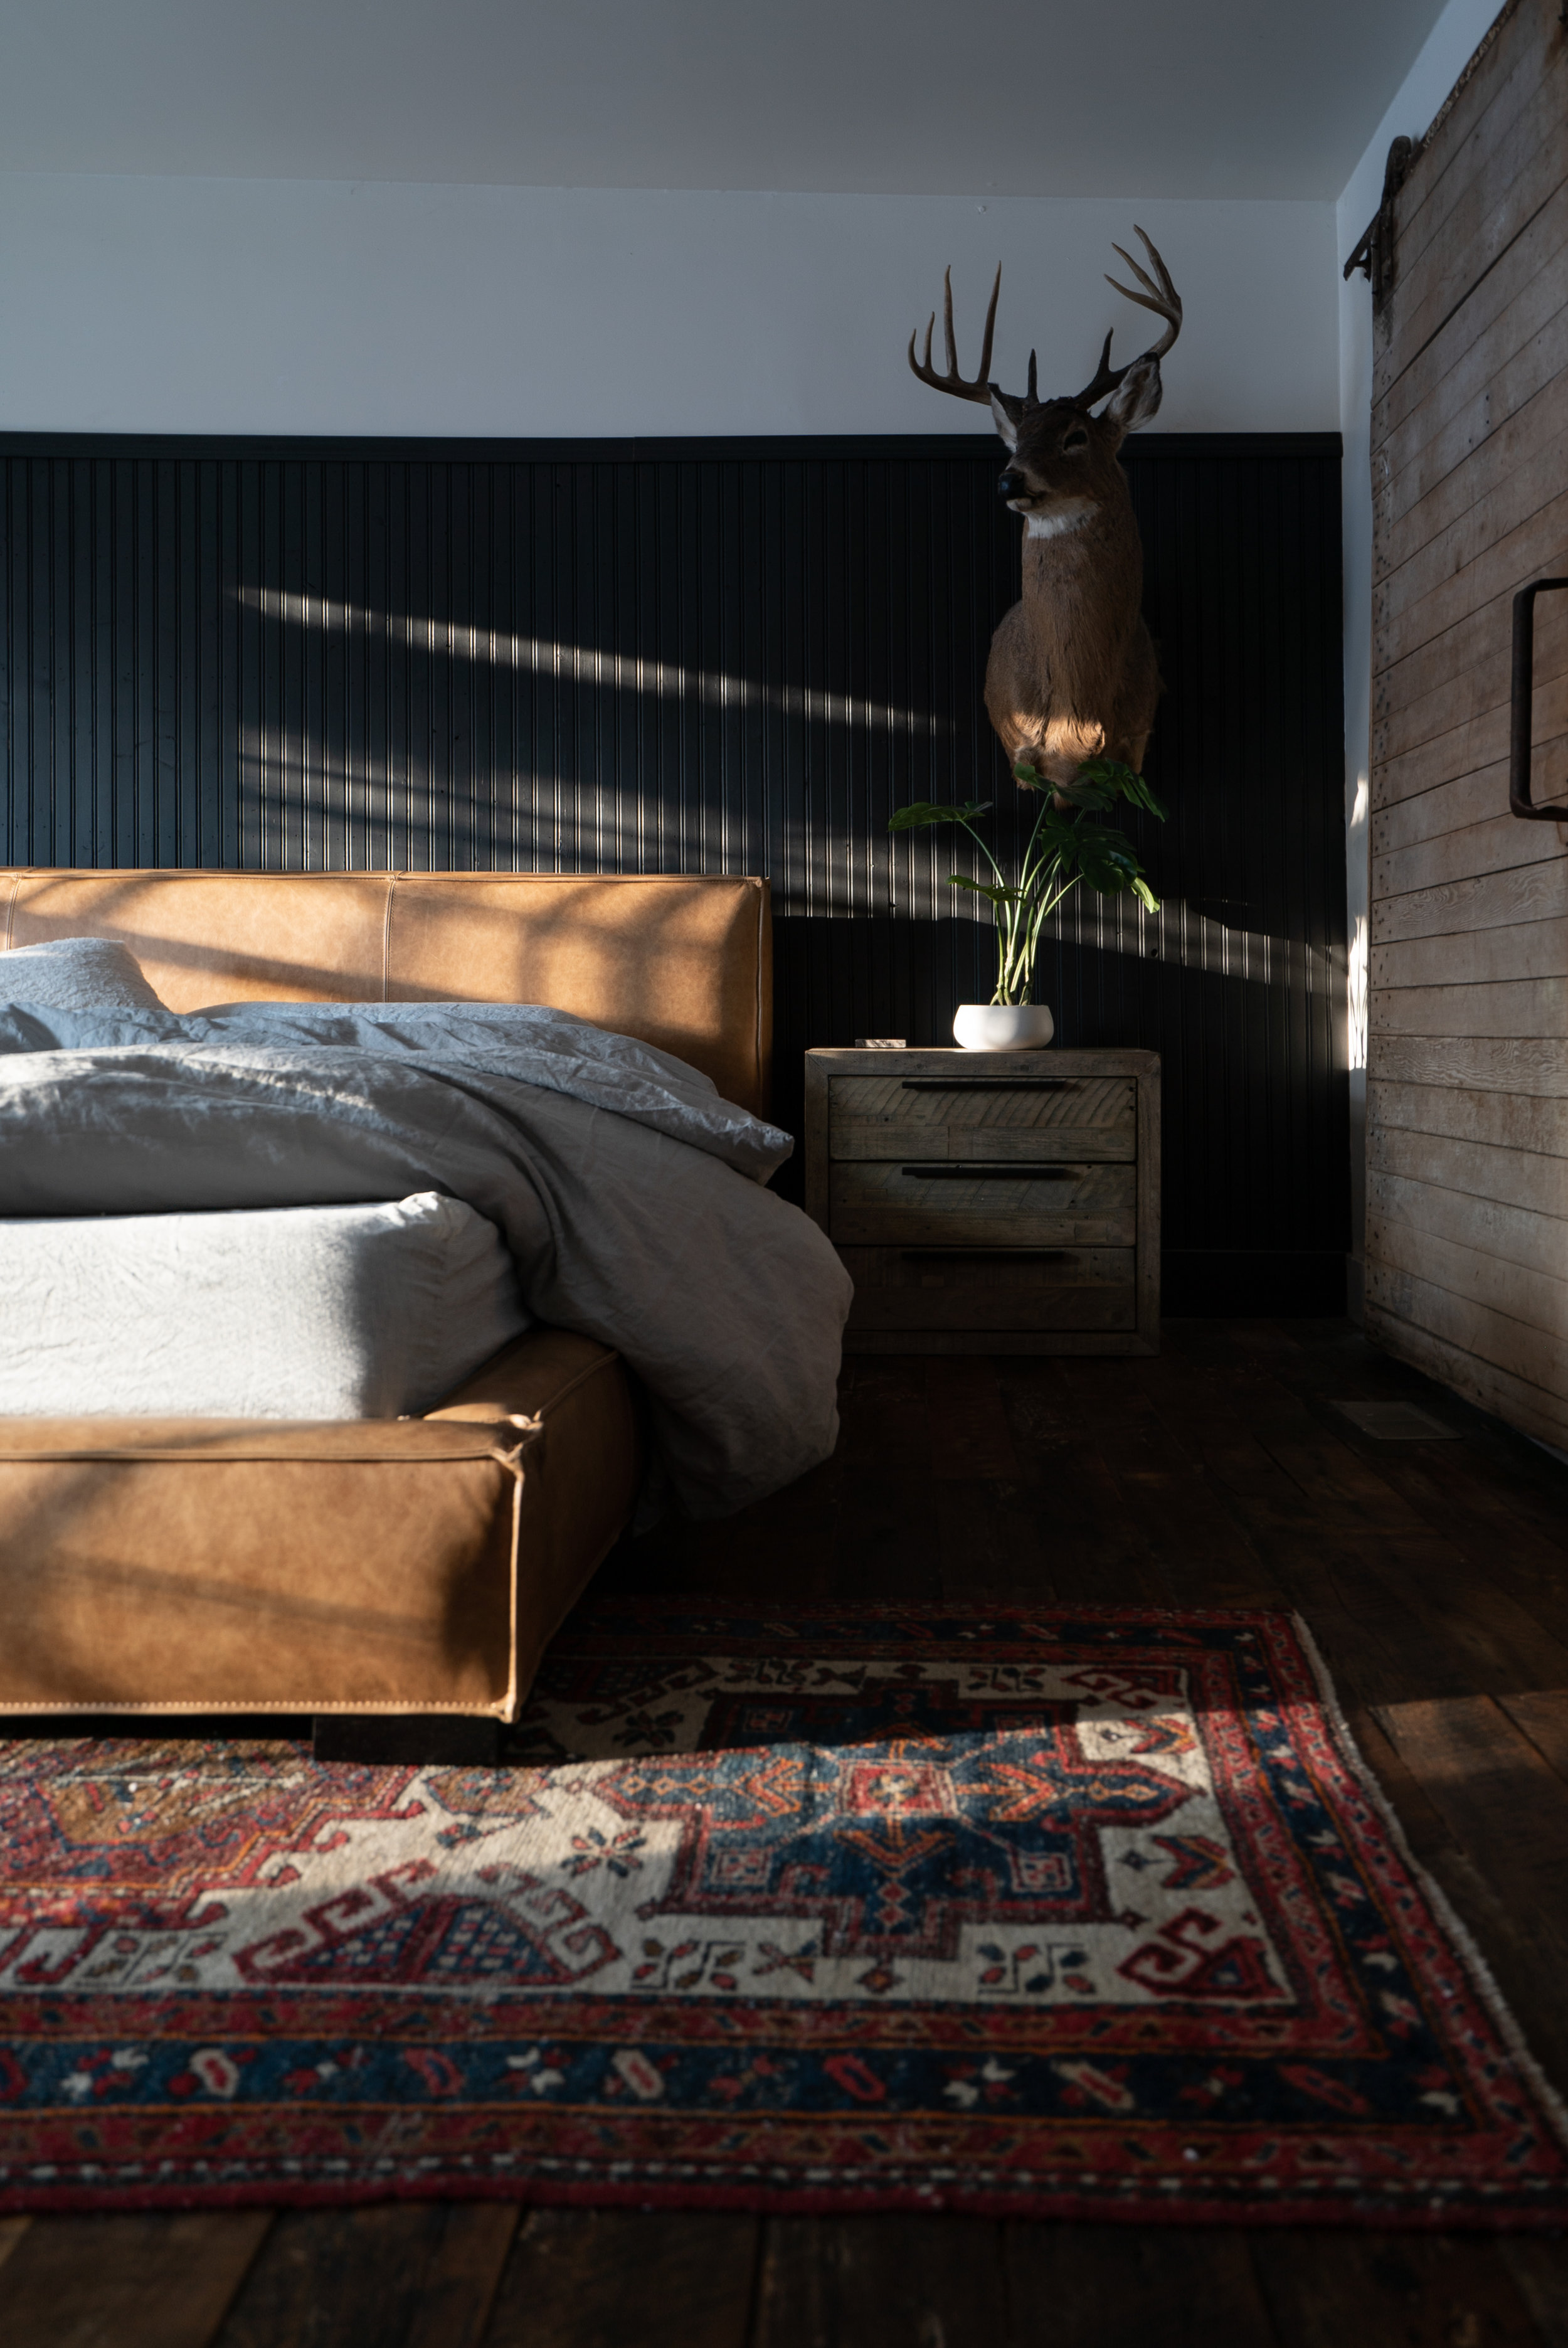
Opposite the entrance to the bathroom is the headboard wall, that we covered in black wainscoting about 80% of the way up. We always think of focal points, so chose that wall to put the headboard on it as it’s the main wall you see when you enter the bedroom.
So if you’ve connected the dots here , you’re noticing that something architectural is on all 4 walls in this bedroom. None of which are the same material, either. Now for some pictures.
We need to get a couple more pictures to show the full wall with the vintage cabinet and final wall with the closet. But we hope you’ve enjoyed the progress so far! Make sure to check out the before and after of Instagram-famous master bathroom so you can see how the design of both spaces is tied together.
STYLE GUIDE
-
Bed: 36” high in Palomino (as of July 2020 looks like Interior Define is no longer making beds. This link will be broken although it will take you to their site. We also have their couch!)
-
Rug: Vintage
-
Street Pavers : Custom
-
Barn Door: Vintage
-
Nightstands: You’ll notice 2 types in these pictures. The one to the left of the bed is from Target and we only used it for a photoshoot. The color is perfect but the shape doesn’t match the rest of the house. The one on the right is going to get sanded down and stained a richer color (more like the floors). But the shape is more modern and masculine, which fits the style of the house better. Notice that we didn’t put it on the legs you see in the pictures.
-
Cabinet for media and clothing: Vintage from the UofM
-
Paint Color: White is our absolute favorite go-to white, Bowline from Dutch Boy. Black Basalt from Ralph Lauren on the accent wall.
And guess what, as of spring, 2022, we have made even more changes! Be sure to check out our Projects page to see the updated look, it's titled Nordic Primary Bedroom. It is so dark and moody, you'll love it.


